7 Symbols · 1 In the queue
Crease symbol glossary
Every line on a crease pattern has a name. This is the full notation used across the site: how each mark is drawn, how the fold is made, and where it most often goes wrong.
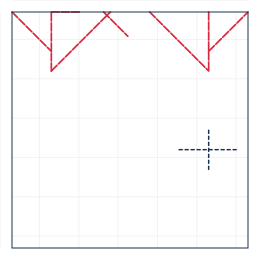
A fold that pushes the paper away from you, so the crease stands up like a ridge. On a crease pattern it is the line that becomes a peak when the paper is folded.
How it reads on a crease pattern
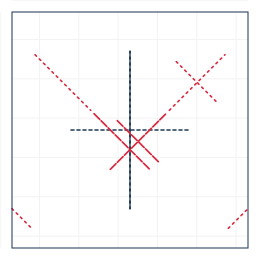
Drawn as a dash-dot line in the two-tone notation used on this site, in the mountain colour. In the classic Japanese convention it is a solid line; in the American convention it is a dash-dot line. Because the same sheet can be drawn either way, the only reliable test is the direction the paper actually moves, never the line style.
How to fold one
Turn the paper over, fold the line as an ordinary valley fold, then turn it back. That is the whole technique, and it is worth doing rather than trying to push a ridge from above: pushing crushes the paper along the crease and leaves a soft, wide line. On thick paper, score the fold from the reverse side with a bone folder first.
Where models need them
Mountain folds do the structural work in almost every collapsing model. In the waterbomb base there are four mountain folds and four valley folds meeting at one point; in the masu box every wall is a mountain fold. Learning to tell a mountain from a valley at a glance on a printed diagram saves more time than any other single skill in origami.
How to fold it
- Locate the line on the diagram; confirm the direction by looking at the adjacent valley folds.
- Turn the paper over so the line is on the far side.
- Fold the line as a valley fold, press the crease with a thumbnail.
- Turn the paper back over and check that the ridge stands toward you, not away.
Common failures
- Pushing a ridge from above instead of folding from the reverse — the crease comes out soft and wide.
- Confusing the dash-dot line for a valley in diagrams that follow the American convention.
- Folding a mountain into paper that is already five layers thick without scoring first, which cracks the top layer.
Used by: Blintz Coin Purse · Samurai Helmet (Kabuto) · Masu Box (Traditional Square Box) · Five-Point Star from a Square · Paper Crane (Orizuru) · Lotus Flower (Two-Layer) · Tulip with a Folded Stem · Flat Heart from a 1:2 Rectangle
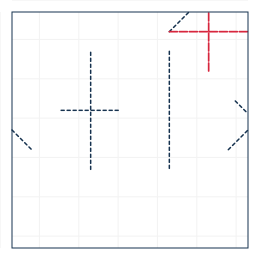
The fold everyone learns first: the paper comes toward you and the crease sinks into a trough. Almost every model starts with a valley fold and most of them are still held together by one.
How it reads on a crease pattern
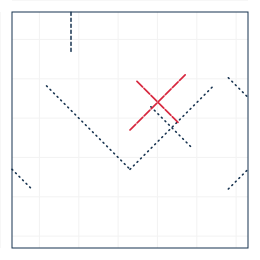
Drawn here as a short-dashed line in the valley colour, which is a deep blue so that it reads clearly against the red mountain family even in a small thumbnail. Valley lines outnumber mountain lines in most crease patterns by roughly two to one, because a flat-foldable pattern must have a difference of exactly two between the two counts at every interior vertex.
How to fold one cleanly
Bring the edge or corner to its target, hold it with one hand, and press the crease from the middle outward with the other. Pressing from the edge inward traps air and produces a crease that is 2 to 3 mm off at the far end — that error is what makes a folded crane lean. For long folds, crease the middle third, then the two outer thirds.
The Maekawa rule
At any flat-foldable interior vertex, the number of mountain folds minus the number of valley folds is always 2. This is Maekawa's theorem, and it is the fastest way to check a crease pattern before folding: count the lines meeting at a point, and if the arithmetic does not come to 2, either the diagram has an error or the point is not flat-foldable.
How to fold it
- Bring the edge or corner exactly to its target point and hold it there.
- Press the middle third of the crease first, not the edge.
- Work outward with a thumbnail, one third at a time.
- Check the alignment at both ends before pressing the whole crease hard.
Common failures
- Creasing from the edge inward, which traps air and leaves the far end 2 to 3 mm out.
- Pressing with the pad of the thumb instead of the nail, which gives a soft crease that will not hold a shape.
- Folding a long crease in one sweep instead of thirds.
Used by: The Flat-Bottom Sampan (A4 Paper Boat) · Blintz Coin Purse · Waterbomb Balloon (Mizusenbei) · Samurai Helmet (Kabuto) · Masu Box (Traditional Square Box) · Five-Point Star from a Square · Paper Crane (Orizuru) · Lotus Flower (Two-Layer)
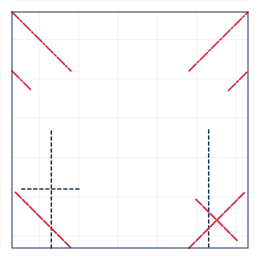
A reverse fold turns a point back on itself from the inside, so the crease ends up hidden between the layers. It is the fold that makes beaks, heads, legs and tails, and it is where most paper gets torn.
Inside and outside
The family has two members. An inside reverse fold pushes the point between the layers and hides the crease; an outside reverse fold wraps it around the outside and leaves the crease visible. Both start the same way — the point is opened along its existing crease, the tip is pushed through, and the layers are closed again — and they differ only in which side the tip ends up on.
How to do one without tearing
Open the point along its own crease first, all the way, before pushing the tip through. The tear happens when the tip is pushed while the point is still partially closed: the paper has nowhere to go and splits at the hinge. Work from the tip inward, and use the flat of a fingernail rather than the tip to guide the layers.
Where models need them
The crane uses two inside reverse folds for the head and tail, the flapping bird uses two more for the wing hinges, and the fox puppet's entire jaw mechanism is one long reverse fold running most of the body. In each case the position of the fold is what sets the model's proportions: moving a reverse fold 3 mm changes the silhouette more than any other single adjustment.
How to fold it
- Open the point along its existing crease, all the way to the base.
- Decide whether the tip goes inside (hidden crease) or outside (visible crease).
- Push the tip through with a fingertip, working from the tip inward.
- Close the layers and press the new crease with the flat of the nail, not the point.
Common failures
- Pushing the tip through while the point is still partly closed — this splits the paper at the hinge.
- Using the tip of the nail to guide the layers, which scores a visible scratch across them.
- Making the reverse fold before the point has a clean crease to open along.
Used by: The Flat-Bottom Sampan (A4 Paper Boat) · Waterbomb Balloon (Mizusenbei) · Samurai Helmet (Kabuto) · Masu Box (Traditional Square Box) · Five-Point Star from a Square · Paper Crane (Orizuru) · Lotus Flower (Two-Layer) · Tulip with a Folded Stem
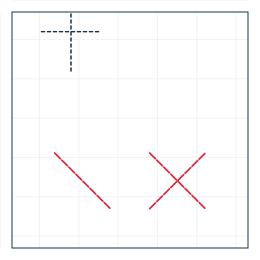
The hidden version of the reverse fold. The point goes between the layers, so from the outside the model shows a clean edge and nothing else — which is why it is used for every head, neck and leg on a finished-looking model.
Reading it on a diagram
A diagram shows an inside reverse fold as an arrow that curves back on itself and crosses the point it is acting on. On a crease pattern it is invisible, because the crease is internal: this is exactly why crease patterns are hard to read backward and why most folders learn from diagrams first.
Angles and where they go
Inside reverse folds are usually placed at multiples of 22.5 degrees, the standard set used in most designed models. The crane's head and tail sit at 90 degrees to the body; the swan's neck uses bends of 55 and 70 degrees; the penguin's head sits at 2.1 cm from the point base. Any of these can be nudged a few degrees, and the model will still work, but the two sides of a symmetric model must be nudged identically.
A common failure
The most frequent mistake is doing an inside reverse fold with the point already creased flat in the other direction. The paper then has two competing creases at the same place and folds along whichever is deeper, which is not necessarily the one you want. Unfold the point fully, press it flat, and start again rather than fighting it.
How to fold it
- Open the point along its existing crease until it lies flat in the opposite direction.
- Slide the tip between the front and back layers, aiming at the base of the point.
- Close the outer layers over the tip and check that the tip is fully hidden.
- Press the hinge crease with a thumbnail, then ease the point to the target angle.
Common failures
- Fighting an existing crease instead of unfolding the point flat and starting again.
- Leaving the tip partly visible between the layers, which shows as a ragged edge on the finished model.
- Setting the two sides of a symmetric model at slightly different angles.
Used by: Paper Crane (Orizuru) · Cicada (Semi, from the Frog Base) · Swan with a Curved Neck · Standing Penguin · Fox Puppet (Mouth Opens and Shuts)
The reverse fold that wraps the point around the outside of the model. The crease stays visible, which is why outside reverse folds are used wherever the line itself is part of the design.
When to prefer it
Use an outside reverse fold when the model's silhouette needs a visible ridge at that point — a bird's leg joint, a frog's knee, a dragon's haunch. An inside reverse fold at the same place would hide the crease and the joint would read as a soft bend instead of a knuckle.
Working with several layers
Outside reverse folds often act on four or more layers at once, and the layers slide against each other. Line them up on the crease before folding, hold the stack between thumb and forefinger, and close the fold in one motion. Trying to fold the layers one at a time produces a stepped edge that cannot be flattened.
Angles
The flapping bird's wing hinges use outside reverse folds left deliberately 15 degrees short of flat, which is what allows the wings to swing. That is the useful property of this fold: unlike most folds in origami, it does not have to be closed all the way, and a partially closed outside reverse fold makes a working hinge.
How to fold it
- Align all the layers that the fold will act on, and hold the stack tightly.
- Open the point along its crease so the tip swings to the outside of the model.
- Close the fold in one motion, keeping the layers aligned on the crease line.
- Press the hinge with a thumbnail; for a hinge that has to move, stop 15 degrees short of flat.
Common failures
- Folding the layers one at a time, which produces a stepped edge that will not flatten.
- Closing a fold that is meant to be a hinge, which stiffens it into a solid bend.
- Letting the layers slip during the closing motion.
No published sequence uses this symbol yet.
A sink pushes a point or a whole region of the model inward, so it disappears between the layers instead of turning back on itself. It is the hardest basic fold because it has to be formed from inside the model.
Open and closed sinks
An open sink is made on a point with no layers blocking it: the point is opened, pushed in, and flattened. A closed sink is made on a point that already has layers passing over it, and the paper has to be inverted from underneath without opening the model. Closed sinks are the reason complex models take hours rather than minutes.
Doing it in the air
Almost every torn sink happens because the model was lying flat on the table. Pick the model up, open the layers that surround the point, and push the point inward from underneath with a fingertip until it inverts with a small click. Then lay it down and flatten. The head sinking in the dragon and the diamond sinking in the butterfly are both done this way.
Why designs use sinks
A sink lets a designer shorten a point without creating an external crease, which is what makes it possible to put a head on a thick neck without changing the silhouette. It is also how three-dimensional forms are made in otherwise flat models: the butterfly's body and the dragon's neck both go below the body line because of sinks.
How to fold it
- Identify whether the sink is open (no layers on top) or closed (layers pass over it).
- For an open sink, open the point, push the tip inward and flatten the new crease ring.
- For a closed sink, hold the model in the air, open the surrounding layers, and invert the point from underneath.
- Lay the model down and press the sink's edge crease flat all the way around.
Common failures
- Doing a closed sink with the model flat on the table — this is where sinks tear.
- Inverting from the front instead of from underneath, which stretches the surrounding layers.
- Leaving the sink's edge crease unflattened, which shows as a bulge on the finished model.
Used by: Waterbomb Balloon (Mizusenbei) · Round Lantern with Folded Ribs · Spinning Top (Koma) That Actually Spins
A petal fold turns a single flap into a narrow point by lifting its middle while its two sides swing in to the centre line. It is the single fold that separates the bird base from the frog base, and therefore the crane from the cicada.
The three creases it needs
A petal fold needs three creases to exist before it can be made: a valley across the flap where the new point will start, and a valley down each side of the flap. The cross crease is made first and unfolded, because the petal rides up along it. Fold the petal without that cross crease and the point goes wherever it likes, usually off to one side.
Lifting, not pulling
The middle of the flap is lifted from underneath with one finger while the other hand keeps the two side edges riding in along their creases. Pulling the tip instead of lifting the middle makes the point short and wide; the resulting model has a stubby body, which is the most common reason a folded bird looks wrong.
Where it appears
The bird base has one petal fold, the frog base has three, and the crane, the swan, the penguin, the cicada and the butterfly all depend on it. In the frog base the two extra petal folds are what give the long hind legs, so the accuracy of the petal fold is what decides whether a frog looks like a frog.
How to fold it
- Fold the cross crease where the new point will begin, then unfold it.
- Fold the two side edges of the flap in to the centre line and leave them folded.
- Lift the middle of the flap from underneath while the side edges ride in along their creases.
- Flatten the new point and press both side creases from the base toward the tip.
Common failures
- Pulling the tip instead of lifting the middle, which gives a short stubby point.
- Skipping the cross crease, so the new point lands off-centre.
- Pressing the side creases from the tip inward, which traps air under the petal.
Used by: Lotus Flower (Two-Layer) · Tulip with a Folded Stem · Cicada (Semi, from the Frog Base) · Swan with a Curved Neck · Standing Penguin