★★★☆☆ Core folds · 8 steps
Standing Penguin
Published · By The Origami Desk
A penguin is a model that has to stand up, which means the folds have to be arranged so the footprint is wide and the head is light. It is folded from a bird base with the points cut short.
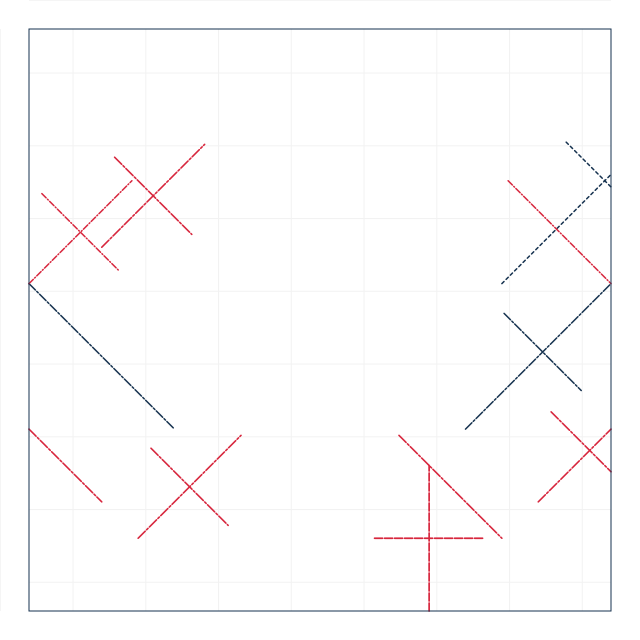
finished crease pattern
Fold sequence
1 / 8
Step 1
Square 15 cm with the dark side up. Fold both diagonals and both centre lines as valleys, then collapse onto the preliminary base.
Getting a flat foot
The hardest part of any standing animal is the base. Here the foot is made in step 7 by folding the bottom point up and then splaying the two layers apart by about 35 degrees. That gives a footprint 5.4 cm wide and 2.8 cm deep, which is enough for a 15 cm penguin to stand without help.
The belly colour break
The white belly is not folded in — it is the reverse side of the paper appearing where the front layer is separated from the back. Step 6 separates them by 1.2 cm along the whole length of the body. Lay the model on a table and check that the white strip is the same width at the shoulders and at the feet before creasing.
The head and the beak
The head is set with a single reverse fold 2.1 cm from the tip of the neck point, and the beak with a second one 6 mm further down. Penguins have short necks, so if the head ends up more than 2.5 cm above the body, the model reads as a duck.
Paper specification
| Sheet size | 15 cm |
|---|---|
| Sheet ratio | 1:1 |
| Paper weight | 80 gsm |
| steps | 8 |
| Difficulty | ★★★☆☆ |
| Base | bird-upright |
15 cm square at 80 gsm, black side up if you are using two-tone paper. The white belly comes from the reverse of the sheet.
Crease symbol quick reference
| Crease notation used | count | first move |
|---|---|---|
| Mountain fold | 1 | Locate the line on the diagram; confirm the direction by looking at the adjacent valley folds. |
| Valley fold | 2 | Bring the edge or corner exactly to its target point and hold it there. |
| Reverse fold | 3 | Open the point along its existing crease, all the way to the base. |
| Inside reverse fold | 1 | Open the point along its existing crease until it lies flat in the opposite direction. |
| Petal fold | 1 | Fold the cross crease where the new point will begin, then unfold it. |
What goes wrong
It will not stand
The feet were not splayed wide enough. Reopen the bottom and splay to 35 degrees.
The belly is a thin stripe on one side
The front and back layers were separated unevenly. Unfold to step 5 and separate from the shoulder down.
Making it hold
- Check the white belly strip is even before creasing; it cannot be evened out afterwards.
- Splay the feet before shaping the body, not after.
- Keep the head within 2.5 cm of the body or it looks like a duck.