★★☆☆☆ Starter folds · 7 steps
Samurai Helmet (Kabuto)
Published · By The Origami Desk
A newspaper helmet scaled down to origami. The two horns are folded from the same sheet, not attached, and the brim is what actually holds the shape on a head.
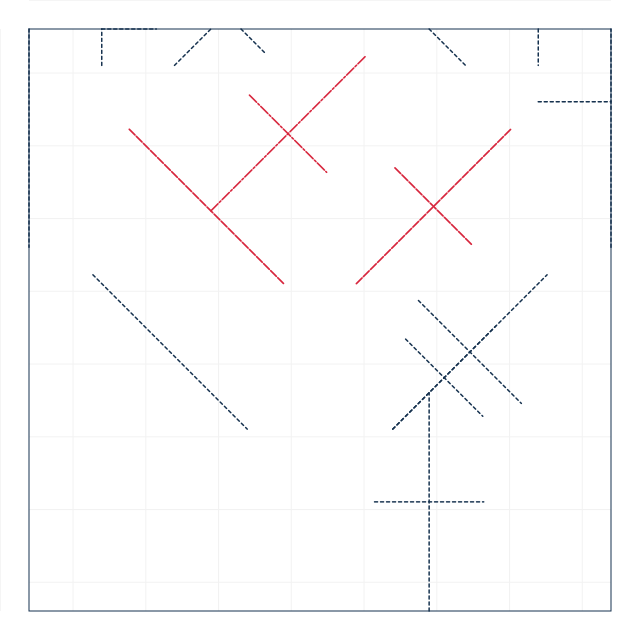
finished crease pattern
Fold sequence
7 / 7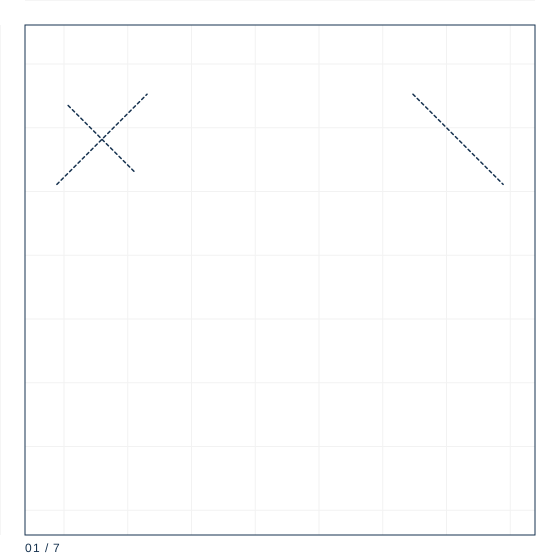
Step 1
Start with a 24 cm square, white side up. Fold it in half diagonally to a triangle, point up.
Step 2
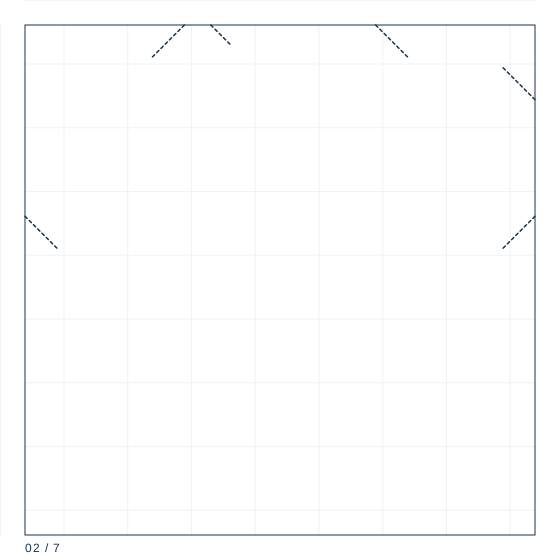
Fold the triangle in half again and unfold, just to mark the centre of the long edge.
Step 3
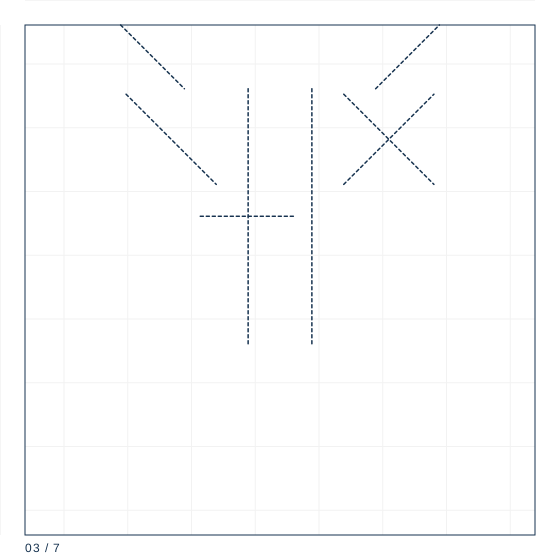
Bring the left corner of the triangle down to the centre mark on the bottom edge, then the right corner in the same way.
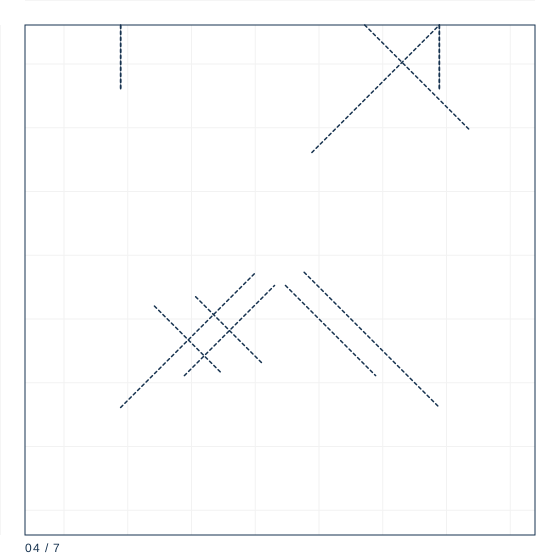
Step 4
You now have a shape with two rectangular flaps standing up. Reverse fold each flap outward at 45 degrees — these are the horns.
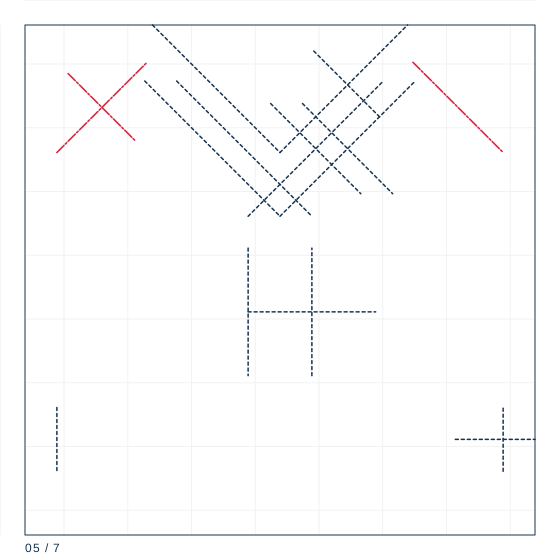
Step 5
Fold the top layer of the bottom edge up to the horizontal line where the two horn bases meet.
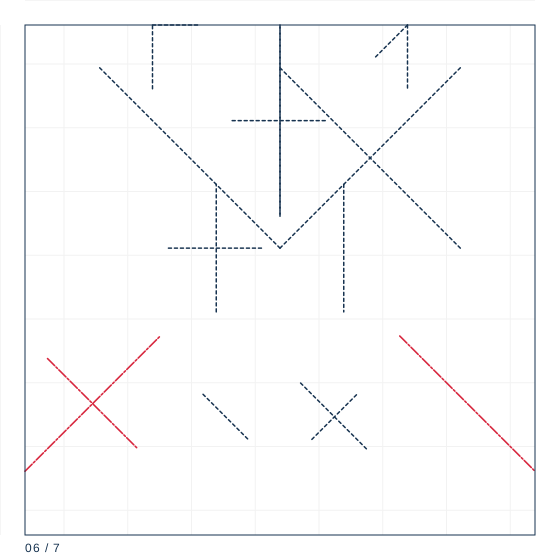
Step 6
Roll that front edge forward two more times, each roll about 1.2 cm wide, to build the brim.
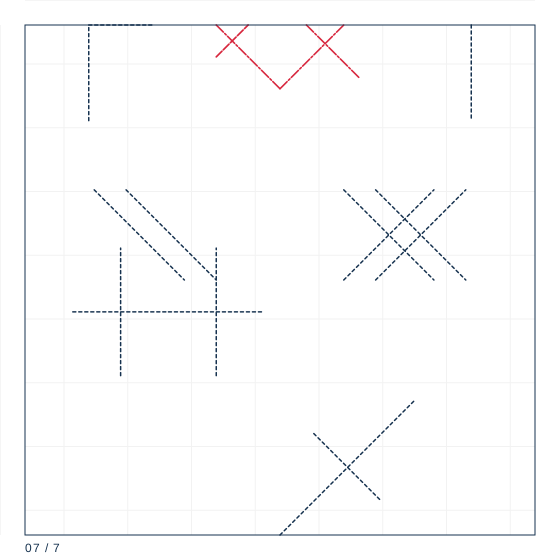
Step 7
Turn the helmet over and open it out from the bottom. Crease the inside of the crown with a mountain fold so it holds a round shape.
The newspaper ancestor
This model descends from the folded newspaper hats that were standard wear for schoolboys and printers in Japan well into the twentieth century. The proportions are inherited: a square gives a helmet that fits a head 52 to 56 cm in circumference, which is why 24 cm paper works for a child and 30 cm paper works for an adult.
Folding the horns
The horns come from the two triangular flaps created when the front corners are brought down to the centre line. Each horn is then reverse folded outward at about 45 degrees. Get the two reverse folds the same distance from the tip — within a millimetre — or the helmet lists to one side, which is visible from across a room.
Making the brim stay open
The brim is a rolled fold, folded three times to the front, each turn about 1.2 cm wide. Rolling gives the front edge enough stiffness that it does not lie flat against the forehead. If you want a helmet that simply sits on a shelf, two turns are enough and the silhouette is cleaner.
Paper specification
| Sheet size | 24 cm |
|---|---|
| Sheet ratio | 1:1 |
| Paper weight | 80 gsm |
| steps | 7 |
| Difficulty | ★★☆☆☆ |
| Base | kabuto |
24 cm square of 80 gsm. The helmet is worn as often as it is displayed, so it needs to survive being put on a nine-year-old's head.
Crease symbol quick reference
| Crease notation used | count | first move |
|---|---|---|
| Mountain fold | 1 | Locate the line on the diagram; confirm the direction by looking at the adjacent valley folds. |
| Valley fold | 6 | Bring the edge or corner exactly to its target point and hold it there. |
| Reverse fold | 1 | Open the point along its existing crease, all the way to the base. |
What goes wrong
The helmet tilts
One horn was reverse folded further from the tip than the other. Unfold both and measure from the flap base.
The brim springs open flat
Only one roll was made. Each roll adds stiffness; do three, or use 100 gsm paper.
Making it hold
- Reverse fold the horns in front of you, then flip the model to check both are the same length before creasing hard.
- Roll the brim toward the outside, not the inside; the roll should be visible when worn.
- Crease the crown's mountain fold with the helmet on your knee, which is roughly the right curvature.