★★☆☆☆ Starter folds · 8 steps
Masu Box (Traditional Square Box)
Published · By The Origami Desk
The masu box is the reference container of origami: everything else is measured against it. A 20 cm square gives a box 7.2 cm across and 3.4 cm deep, and the walls are double thickness with no glue anywhere.
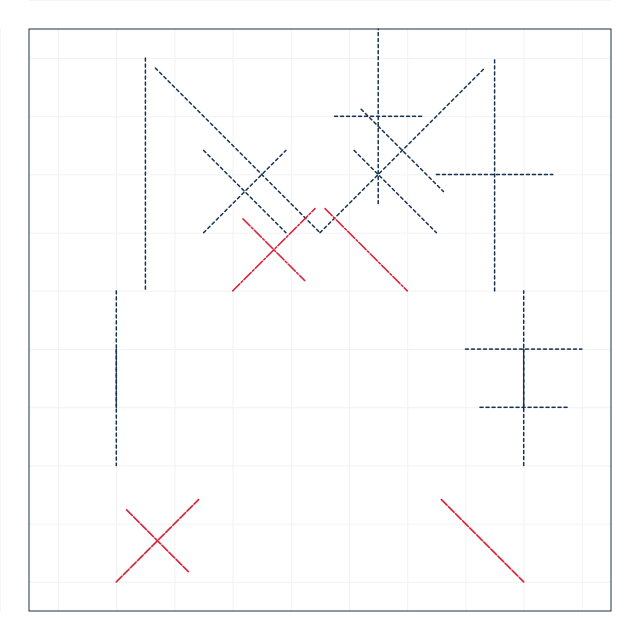
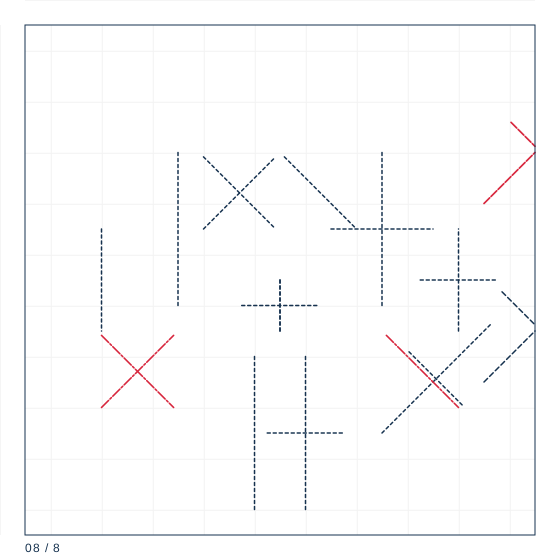
finished crease pattern
Fold sequence
8 / 8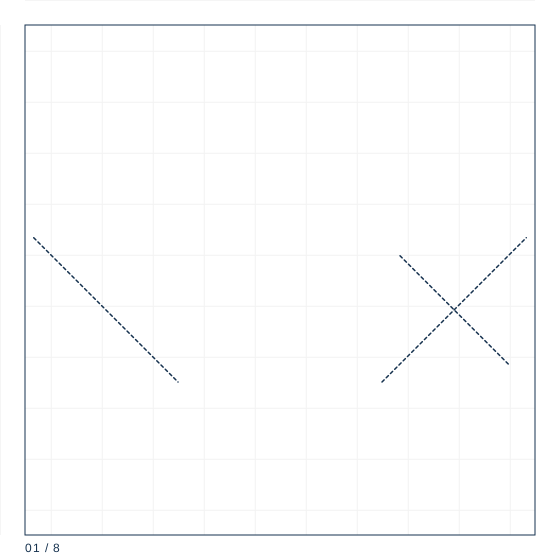
Step 1
Square 20 cm, coloured side up. Fold in half side to side and top to bottom, then unfold.
Step 2
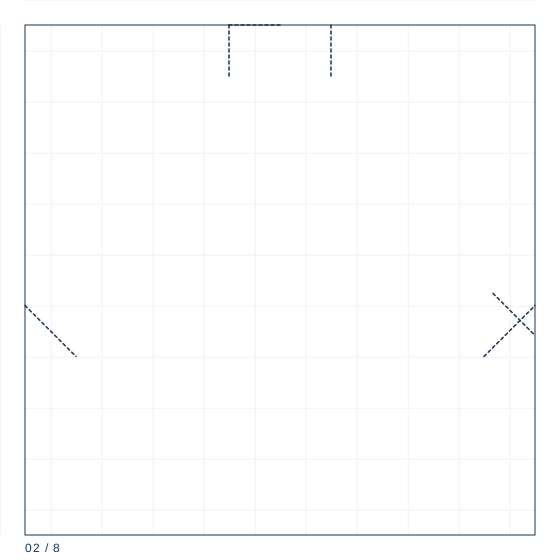
Bring the bottom edge up to the centre line. Crease only the left half of that fold, then unfold.
Step 3
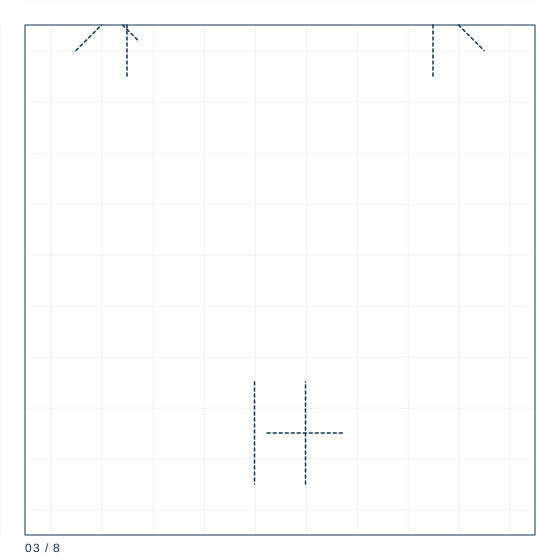
Where that short crease meets the vertical centre line is your one-third mark. Fold the top edge down to that mark and leave it folded.
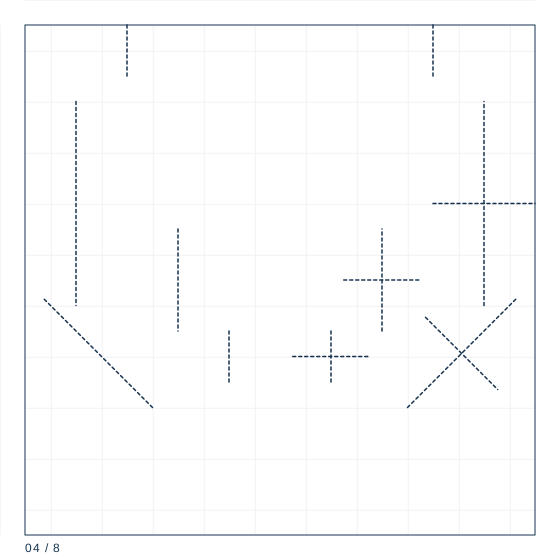
Step 4
Fold the bottom edge up to the same one-third line. The sheet is now a strip of three equal bands.
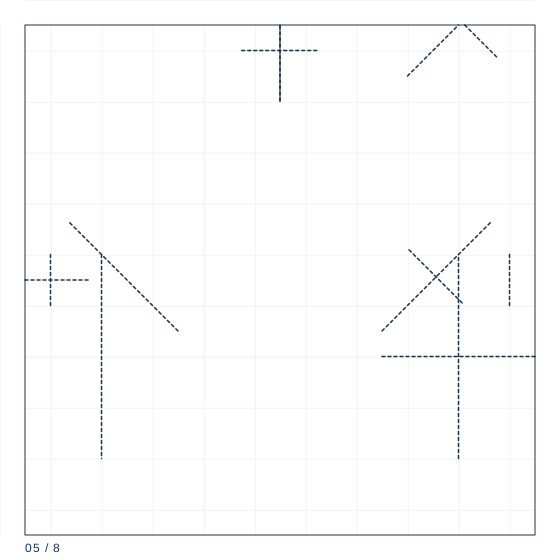
Step 5
Fold the left and right ends in to the edges of the middle band, crease, and unfold — these two creases become the box walls.
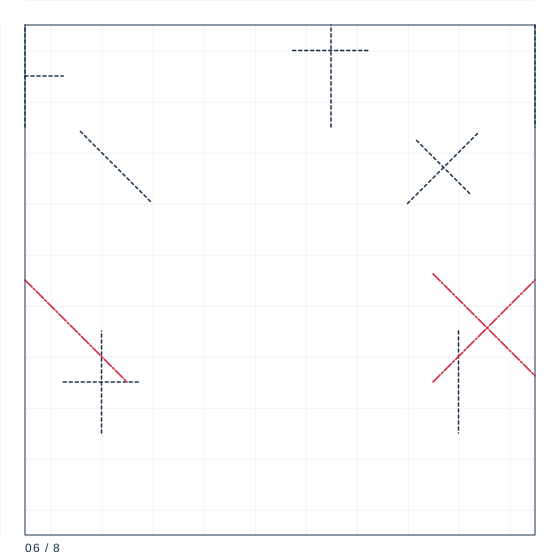
Step 6
Open the left and right flaps, then collapse the top and bottom bands upward so the walls stand. Work the corners one at a time.
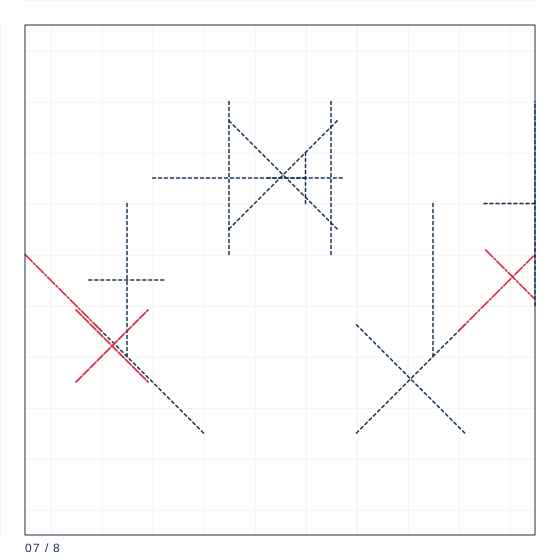
Step 7
Tuck the fourth corner flap under the first one. It should slide, not push; if it resists, you are folding counter-clockwise.
Step 8
Press the floor flat from inside with two fingers and square the rim. The box is finished; a lid is the same folds on a sheet 0.5 cm wider.
The 1/3 marking
Everything depends on dividing the sheet into thirds without a ruler. Fold the square in half both ways and unfold, then bring one edge to the centre line and crease only the outer quarter. The intersection of that short crease with the centre line marks the one-third point. Fold the opposite edge across to that mark and you have thirds to within about half a millimetre.
How the corners lock
The box is built from four identical corner units that fold inward in sequence. The critical step is the third and fourth corner: each one tucks under the flap of the previous corner. Reading the collapse clockwise means the last flap slides under the first, which is the only genuinely tight joint in the model. Reverse that direction and the box still looks right but slides open under a load of about 200 g.
Lids, dividers and load
For a lidded pair, fold the lid from a sheet 0.5 cm larger in each direction so it drops on without force. A 20 cm base box comfortably holds about 350 g of loose coins or roughly 60 business cards, and the four-layer floor means it does not bulge until past 500 g.
Paper specification
| Sheet size | 20 cm |
|---|---|
| Sheet ratio | 1:1 |
| Paper weight | 100 gsm |
| steps | 8 |
| Difficulty | ★★☆☆☆ |
| Base | masu |
20 cm square at 100 gsm. Folded from two sheets if you want a lidded pair; the lid is folded from a sheet 0.5 cm larger in each direction.
Crease symbol quick reference
| Crease notation used | count | first move |
|---|---|---|
| Mountain fold | 1 | Locate the line on the diagram; confirm the direction by looking at the adjacent valley folds. |
| Valley fold | 6 | Bring the edge or corner exactly to its target point and hold it there. |
| Reverse fold | 1 | Open the point along its existing crease, all the way to the base. |
| Squash fold | 1 |
What goes wrong
The walls lean outward
The third-line creases were not sharp enough to hold. Unfold, re-crease with a bone folder, and collapse again.
The bottom is lumpy
The box was folded from paper below 80 gsm. Use 100 gsm; the floor needs stiffness to stay flat.
Making it hold
- Mark thirds on both axes but only crease the third-lines hard; the quarter creases should stay soft.
- Collapse the corners in a clockwise sequence and remember which flap is on top.
- Square the rim by pressing down on the floor, not by pulling the walls outward.